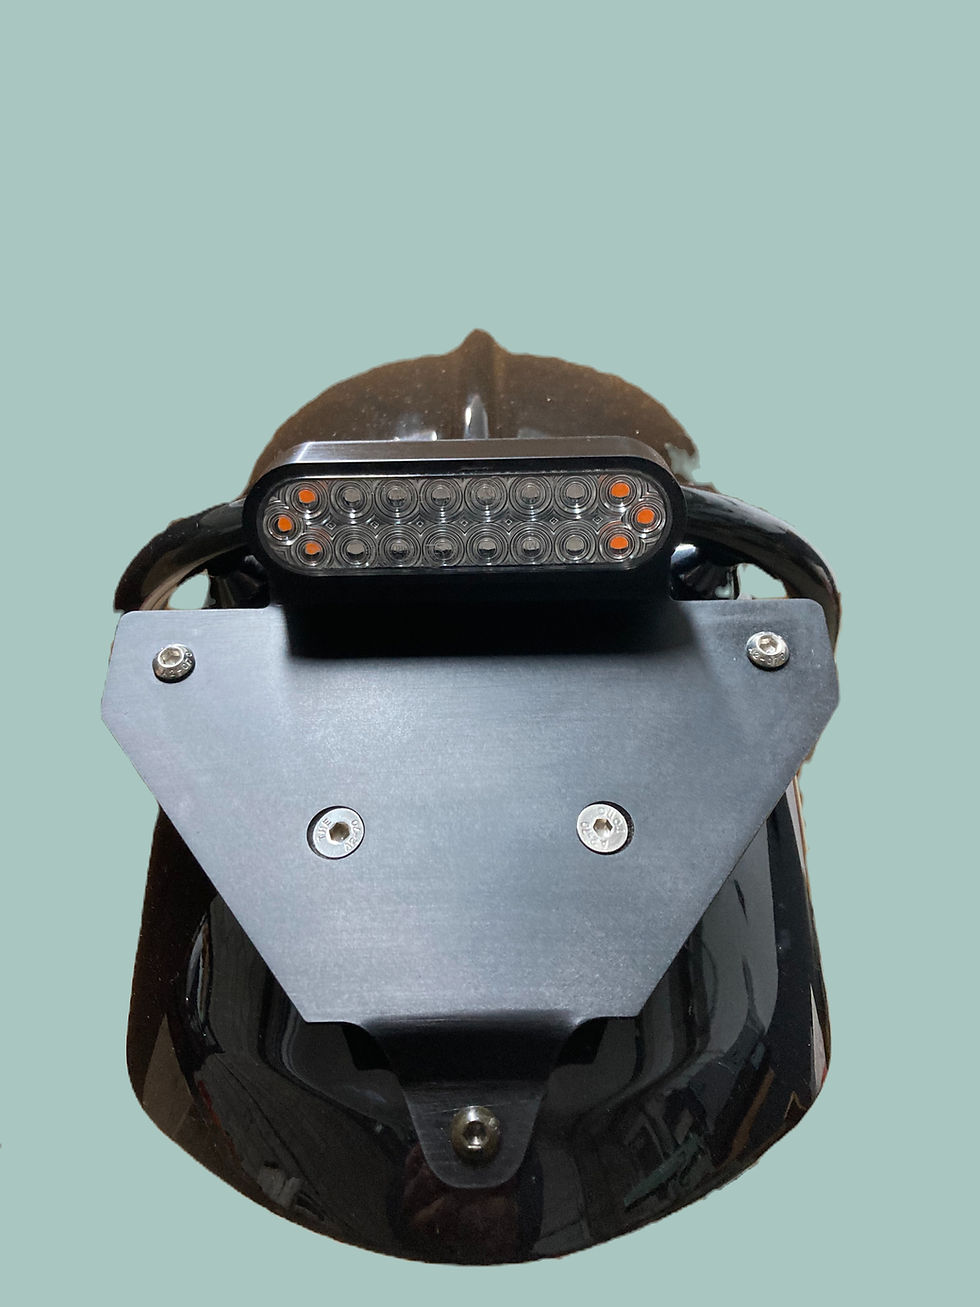
Almost plug & play fender mount lamp kit Triumph Bonneville Thruxton Scrambler 900
- James
- Aug 9, 2015
- 3 min read

Updated: Dec 24, 2025
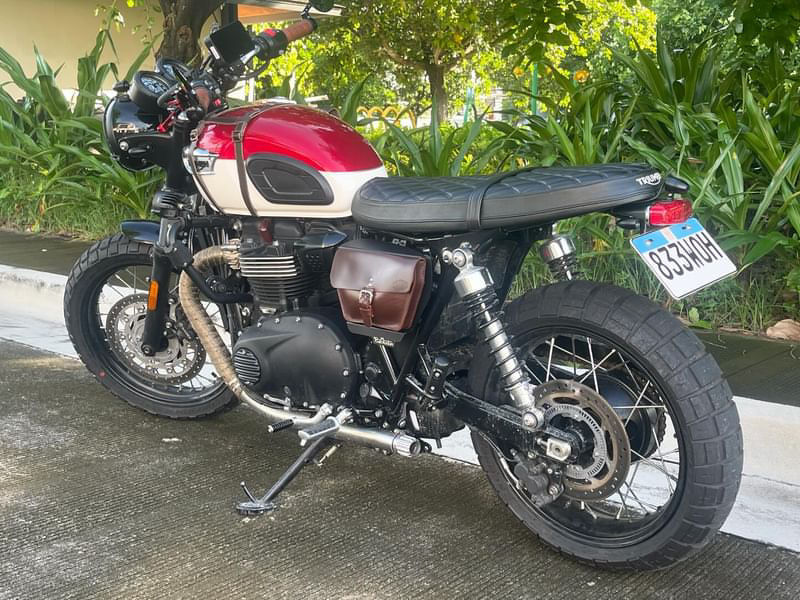
Fenders...... some folk don't and some folk do. No matter what your thoughts are. Everyone agrees they look way better on a Triumph modern classic without the (temporary) stock light.
Well there are some kits available constructed from a piece of bent up plate that show all the wires hanging out the back of the lamp. But ....its no upgrade. This kit does not require a mechanic or electrician to install and is a big upgrade in quality and looks. These are some of the benefits of the low profile almost plug & play fender mount tail lamp kit. Direct bolt on. No drilling. No fiddlin' 1/ Aluminum housing interchangeable with different lamps and signals. 2/ No visible wires hanging out back of lamp. All connectors concealed/weather proofed in housing 3/ Compatible to European turn signal spacing law. Can be used with stock signals. 4/ 1 3/4" lower profile than stock light. Fits with all grab rails and racks. 5/ Front and rear turn signals fit direct to existing light harness with O.E.M connectors 6/ Fits Bonneville 900, Thruxton and Scrambler fender 7/ All rear lamps have running / brake light and license plate illumination 8/ Only 4 basic tools needed for install : 4mm Allen wrench, 10mm wrench, crimp pliers, 17mm or adjustable wrench
9/ D.O.T and E marked tail light lens


When using kit with bullet signals and Lucas lamp. See below for the color hook up instruction. Kit is supplied with 3x Honda type crimp on bullet connectors. The 3 wires to tail light are only wires that need the connectors fitted. All turn signals are plug and play.

Harness wire color Lamp wire Color --Connects to-- Black 1x (ground) Tail Lamp - see below
Red Tail light + see below Blue Brake + see below Black 2x (ground) Turn signal - black/white stripe
Orange Black + Turn signal Left Brown Black + Turn signal Right
Turn Signals
BLACK.........POSITIVE +
BLACK / WHITE ........NEGATIVE -
Lucas 525
Black/white ...........Ground -
Black lamp.................Tail light +
Red..................................Brake +
LED Smoke / Red Lens & Round 56 Tail lamp
BLACK..................GROUND -
BLUE.....................TAIL LIGHT +
RED.......................BRAKE +
LED Cyclops
Black .....................Ground -
White......................Tail Light +
Red ........................Brake Light +
LED Bullseye
Black.................Ground -
Brown...............Tail Light +
Red...................Brake Light +


1/ Remove 3 nuts securing light assembly. Raise the light from fender so signal connectors can be disconnected.
2/ 3 wires to tail light have no connectors so remove 3 cross head screws allowing lamp to be removed from the chassis.
Cut the 3 wires an 2 inch from lamp and crimp connectors on harness. If you leave 2 inch of wire the oem light can be re used.
3/ If using new signals install signals on base chassis and route wire as stock.
4/ Install tail light on aluminum housing.
5/ Using 3 Allen screws and spacers secure housing to chassis. Tip... lightly grease the shanks of the screws. This will hold the spacers in place when assembling to the chassis in an inverted position.
Make sure you leave enough wire length to give access when joining connectors and tuck excess tail light wire in housing.
6/ Join connectors and secure assembly to fender.


Comments